To remove mold from your AC coils, start by preparing yourself with protective gear and turning off the unit. Then, disassemble it to access the coils, and clean the surrounding area to prevent mold spread. Use a gentle cleaning solution and soft-bristled brush to remove debris, and a bleach solution to kill the mold. Rinse and dry the coils thoroughly before reassembling the unit. By following these steps, you'll be well on your way to a mold-free AC – and if you want to ensure the job is done right, keep going to learn more about the process.
Key Takeaways
- Wear protective gear, shut off the AC unit, and clean the surrounding area to prevent mold spread before starting the removal process.
- Disconnect the power source, disassemble the unit, and clean the coils gently to avoid damage and ensure proper air circulation.
- Mix a solution of one part bleach with three parts water, spray it onto the coils, and let it sit for 10-15 minutes to kill the mold.
- Rinse the coils thoroughly with a garden hose, pat them dry, and use a fan or blower to speed up evaporation and reduce humidity.
- Reassemble the AC unit according to the manufacturer's instructions, ensuring all components are securely attached to prevent future mold growth.
Prepare for Mold Removal
Before diving into the mold removal process, take a few minutes to prepare yourself and the area around the AC coils.
You'll want to wear protective gear like gloves, goggles, and a face mask to avoid exposure to mold spores. Next, turn off the AC unit and ensure the coils are cool to the touch.
Wear protective gear like gloves, goggles, and a face mask, then turn off the AC unit and let the coils cool down.
Perform a thorough mold inspection to identify the extent of the growth. This will help you determine the best approach for removal.
As part of your coil maintenance routine, clean the surrounding area to prevent mold from spreading. Remove any debris or dust that may be contributing to the mold growth.
Shut Down and Disassemble the AC Unit
You'll need to shut down the AC unit and disassemble it to access the coils.
Start by turning off the power source to the unit, ensuring your safety while working on it.
Next, disconnect the electrical connections and remove the outer casing to expose the coils and surrounding components.
Turn Off Power Source
| Step | What to Do | Why |
|---|---|---|
| 1 | Locate the circuit breaker or fuse box | Identify the power source |
| 2 | Flip the breaker or remove the fuse | Cut power to the AC unit |
| 3 | Check the thermostat or control panel | Verify the unit is off |
| 4 | Confirm the unit is silent and still | Ensure your safety |
| 5 | Proceed with disassembly | Only when the unit is safely off |
Disconnect Electrical Connections
Now that you've confirmed the AC unit is safely shut down, it's time to disconnect the electrical connections and disassemble the unit.
Ensure electrical safety by identifying the connection types, such as wire nuts, wire connectors, or terminal blocks. Remove the wires from their connections, taking note of their corresponding terminals. You may need to use a screwdriver or pliers to release the wires.
Be careful not to touch any internal components or wires to prevent electrical shock. Once you've disconnected all electrical connections, you can proceed to disassemble the AC unit further.
Remember to handle the components with care to avoid damage or injury.
Remove Outer Casing
With the electrical connections safely disconnected, turn your attention to removing the outer casing of the AC unit. You'll need to remove the screws or clips holding the casing in place. Be gentle, as you don't want to damage the surrounding components. Once removed, set the casing aside, taking note of the screws or clips you removed.
| Casing Removal | Coil Accessibility |
|---|---|
| Easier access to coils | Improved air circulation |
| Reduced risk of damage | Enhanced coil cleaning |
| Simplified maintenance | Increased system efficiency |
With the outer casing removed, you'll have better access to the coils, making it easier to remove mold and debris. This will improve air circulation, reduce the risk of damage, and enhance overall system efficiency.
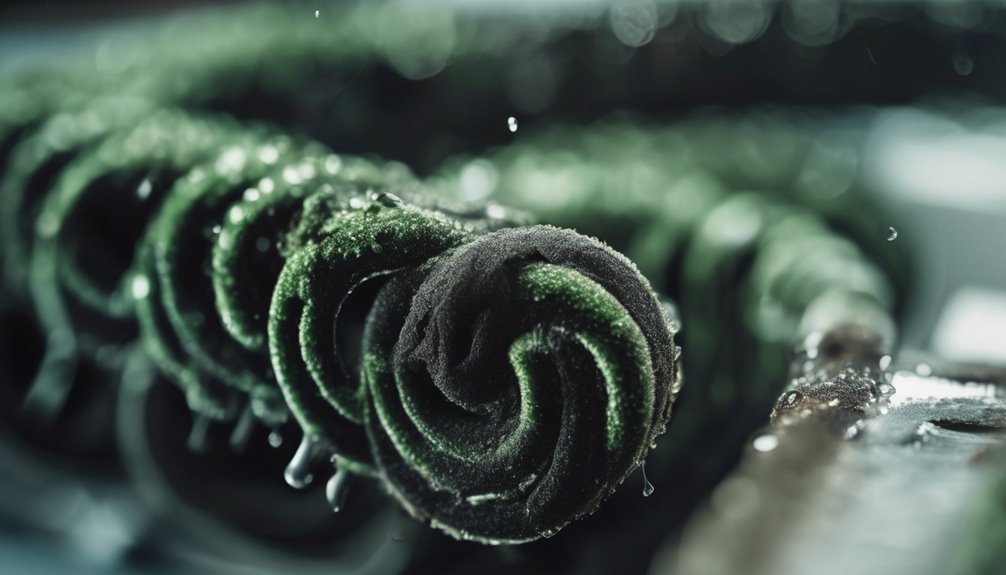
Clean the Coils and Surrounding Area
You'll need to don a pair of gloves, safety goggles, and a face mask to protect yourself from mold spores and cleaning solution.
Now, use a soft-bristled brush or a vacuum cleaner with a gentle suction setting to remove any loose debris from the coils and surrounding area.
This is an essential step in coil maintenance, as it ensures proper air circulation and helps prevent mold growth.
Proper coil maintenance is crucial for ensuring good air circulation and preventing mold growth.
Be gentle when cleaning the coils, as they can be easily damaged.
Use a dry cloth to wipe down the surrounding area, removing any dirt or dust that may be present.
Kill the Mold With a Solution
The solution you'll be using to kill the mold is a mixture of water and bleach.
This solution is effective in killing mold and mildew, and it's a cost-effective alternative to commercial mold removers.
You can mix one part bleach with three parts water in a spray bottle.
Spray the solution onto the coils, making sure to saturate the entire area.
Let it sit for 10-15 minutes to allow the solution to penetrate and kill the mold.
This solution is also great for mold prevention, as it can help prevent future mold growth.
Compared to other solutions, this mixture is gentle on the coils and won't damage them.
Rinse and Dry the Coils
After letting the solution sit for 10-15 minutes, it's time to rinse the coils thoroughly to remove any remaining mold and bleach solution.
Use a garden hose with a spray nozzle to rinse the coils from the inside out. Make sure to rinse all surfaces, including the coil fins and surrounding areas.
To ensure proper drying, follow these steps:
- Use a clean towel or microfiber cloth to gently pat the coils dry.
- Use a fan or blower to circulate air around the coils, speeding up the evaporation process.
- Consider using a dehumidifier to reduce the surrounding humidity, which will help the coils dry faster.
Proper drying techniques are crucial for effective coil maintenance.
Reassemble and Test the AC Unit
Now that the coils are dry, it's time to reassemble the AC unit and test it to ensure it's working efficiently and mold-free.
Reattach the coils, fan, and other components according to the manufacturer's instructions. Once everything is back in place, turn on the AC and let it run for a few minutes.
Check the air vents to ensure they're blowing cool, clean air. Proper coil maintenance is crucial for maintaining good air quality, so make sure to inspect and clean the coils regularly.
If you notice any musty odors or reduced airflow, it may be a sign that mold has returned, and you'll need to repeat the cleaning process.
Frequently Asked Questions
Can I Use Bleach to Kill Mold on AC Coils?
You're wondering if bleach can kill mold, but beware: it's not the best choice. Bleach can't penetrate mold's roots, and its harshness can create mold resistance. Instead, opt for gentle, specialized cleaning solutions that effectively eliminate mold without damaging your AC coils.
Will Mold Come Back After Cleaning the Coils?
You'll likely face regrowth if you don't address underlying mold regrowth factors, like moisture and poor air circulation. Sticking to regular coil maintenance schedules will help prevent it from coming back, so stay on top of cleaning and inspections!
How Often Should I Clean My AC Coils?
You should establish a coil maintenance schedule to ensure your AC runs efficiently. Set seasonal cleaning reminders to inspect and clean your coils every 3-6 months, or more often in humid climates, to prevent mold growth and maintain optimal performance.
Can I Clean AC Coils With a Pressure Washer?
You shouldn't use a pressure washer for coil maintenance, as the high pressure can cause water damage to the coils and surrounding components. Instead, opt for a gentler cleaning method to avoid costly repairs down the line.
Do I Need to Replace the AC Filter After Mold Removal?
When tackling any cleaning task, you'll want to change the air filter afterward to ensure you're not circulating dirty air. In this case, yes, you should replace the AC filter after mold removal to maintain good filter maintenance and preserve air quality.
Conclusion
You've successfully removed mold from your AC coils! Now, turn the power back on and test the unit to ensure it's running smoothly and efficiently. Remember to check and clean the coils regularly to prevent mold growth in the future. With your AC unit mold-free, you can breathe easier knowing your indoor air quality has improved, and your energy bills will be lower too.