You can prevent your window AC from breaking down by following some simple repair and cleaning tips. Start by identifying the source of the problem, then check and replace the air filter, defrost the coils, and unclog the drainage system. Ensure proper installation and sealing, and inspect and clean the fan and motor. Balance the thermostat for efficient cooling, and remove dust and debris with a deep clean. By following these tips, you can reduce energy consumption, extend the lifespan of your unit, and stay cool all summer – and we'll show you how to do it all in no time.
Key Takeaways
- Regularly check and replace the air filter to improve airflow and reduce energy consumption.
- Defrost the coils and clean the condensate pan to maintain optimal airflow and prevent water damage.
- Unclog the drainage system and inspect for blockages to prevent water accumulation and mold growth.
- Clean the exterior and interior vents, as well as the fan and motor, to ensure proper airflow and reduce energy consumption.
- Perform scheduled checks and maintenance to catch potential issues before they become major problems and extend the AC's lifespan.
Identify the Source of the Problem
When your window AC unit starts malfunctioning, it's essential to pinpoint the root cause of the issue before attempting any repairs.
You don't want to waste time and money fixing the wrong problem. Start by checking the power source. Is the cord securely plugged in? Have you experienced a tripped circuit? If so, reset the breaker or replace the fuse.
Next, inspect the wiring. Faulty wiring can prevent the unit from functioning properly. Look for signs of wear, damage, or corrosion. Check the connections to ensure they're secure.
Check and Replace the Air Filter
Now that you've identified the root cause of the problem, it's time to focus on the air filter.
A dirty air filter can significantly reduce your window AC's performance and efficiency. Start by checking the filter for dust, dirt, and debris.
If it's dirty, replace it with a new one. Filter maintenance is crucial to ensure your window AC runs smoothly. Regular filter replacement can help improve airflow, reduce energy consumption, and even prevent breakdowns.
Make it a habit to check and replace the air filter every 1-2 months, depending on usage. By doing so, you'll breathe easier and enjoy a cooler, more comfortable space.
Defrost the Coils for Better Airflow
Because your window AC's coils are responsible for heat transfer, they can easily become frosted or frozen, hindering airflow and reducing the unit's overall performance.
To maintain optimal airflow, you'll need to defrost the coils regularly. Start by turning off the AC and unplugging it from the power outlet. Next, remove the grille and filter to access the coils.
Use a soft brush or cloth to gently remove any frost buildup. You can also use a mixture of equal parts water and white vinegar to wipe down the coils.
Regular coil maintenance will prevent frost buildup and ensure your window AC runs efficiently. By defrosting the coils, you'll improve airflow and reduce your energy bills.
Unclog the Drainage System
You'll want to ensure your window AC's drainage system is clear to prevent water damage and mold growth.
Start by checking for blockages in the condensate pan and drainage tubes, as these can cause water to back up.
Next, inspect the drainage tubes themselves for any kinks or bends that might be restricting water flow.
Check for Blockages
How efficiently does your window AC drain water? If you've noticed water accumulation around your unit, it's likely due to blockages.
Check for window obstructions that might be restricting airflow, causing condensation to build up. Ensure there's at least a few inches of clearance around the unit.
Next, inspect the vents for blockages, such as dust, dirt, or debris. Clean or replace the air filter to prevent vent blockages.
Also, check if the AC's drainage system is clogged with dirt or debris. Clearing these blockages will help your window AC drain water efficiently and prevent water damage or mold growth.
Inspect Drainage Tubes
Now that you've cleared any blockages around the unit, it's time to inspect the drainage tubes.
Check the tubes for kinks, twists, or damage that could restrict water flow. Drainage tubes are usually made of rubber, vinyl, or PVC materials, so handle them gently to avoid damaging them.
Use tube cleaning tools like a soft-bristled brush or a tube cleaning kit to remove any debris or mineral buildup. Make sure to clean the tubes from both ends to ensure proper water flow.
If you find any damage or cracks, replace the tubes to prevent water leaks and further damage to your window AC unit.
Clean Condensate Pan
The condensate pan, located at the bottom of your window AC unit, collects water that drips from the evaporator coils.
Regular pan maintenance is crucial to prevent water accumulation and potential damage. You'll need to clean the condensate pan regularly to ensure proper drainage.
Start by turning off your AC unit and unplugging it from the power outlet. Remove any large debris from the pan, then mix equal parts water and white vinegar in the pan.
Let it sit for 30 minutes to allow the solution to break down any mineral deposits. Finally, rinse the pan with clean water and dry it with a soft cloth.
This simple condensate cleaning process will keep your window AC unit running smoothly and efficiently.
Ensure Proper Installation and Sealing
Proper installation and sealing of your window AC unit is crucial to its performance and energy efficiency.
You need to ensure proper sealing to prevent cool air from escaping and warm air from entering. Start by choosing the right window placement, considering factors like sunlight, wind direction, and window size.
Ensure the unit fits snugly in the window, and the brackets are securely fastened. Use weatherstripping or foam tape to seal any gaps between the unit and the window frame.
Double-check that the unit is level and plumb to prevent water from accumulating inside. By following these steps, you'll enjoy efficient cooling and lower energy bills.
Clean the Exterior and Interior Vents
You'll want to start by removing any debris and dust that's accumulated on the exterior and interior vents, as this can impede airflow and reduce your AC's efficiency.
Next, clean the filter screens to ensure they're not clogged with dirt and dust.
Finally, make sure to dry the vent openings to prevent moisture buildup and mold growth.
Remove Debris and Dust
Get ready to tackle the exterior and interior vents of your window AC, as they're often the culprits behind reduced airflow and efficiency.
Remove any outdoor obstructions, like leaves or twigs, that might be blocking airflow from the exterior vents. You'll also want to check the window sills for any debris that may have accumulated.
Use a soft-bristled brush or a dry cloth to gently sweep away dirt and dust from the vents. Don't forget to inspect the interior vents as well, using a vacuum cleaner or a damp cloth to remove any built-up dust or debris.
Clean Filter Screens
The filter screens on your window AC's exterior and interior vents are crucial for capturing dust and debris, but they can become clogged over time, reducing airflow and efficiency.
You'll need to clean these screens regularly to ensure your AC runs smoothly. Remove the filter screens from the vents and gently tap them to dislodge any loose debris.
Then, soak them in warm soapy water for about 30 minutes. Use a soft-bristled brush to scrub off any stubborn dirt or grime.
Rinse the screens thoroughly and let them dry before reinstalling them. Regular filter maintenance and screen cleaning will help your window AC breathe easier, improving its performance and longevity.
Dry Vent Openings
Clean dust and debris from the exterior and interior vent openings to ensure your window AC operates efficiently.
You'll be surprised how much dust and dirt can accumulate, blocking airflow and reducing performance. Use a soft-bristled brush or vacuum cleaner to gently remove debris from the exterior vent openings.
For the interior vents, use a damp cloth to wipe away dust and dirt. Make sure to check the vent connections, including those linked to your dryer connections, to ensure they're securely attached and not obstructed.
Proper ventilation is crucial for your window AC's performance, so don't neglect this step. By keeping your vents clean, you'll improve airflow, reduce energy consumption, and prolong the lifespan of your window AC's ventilation systems.
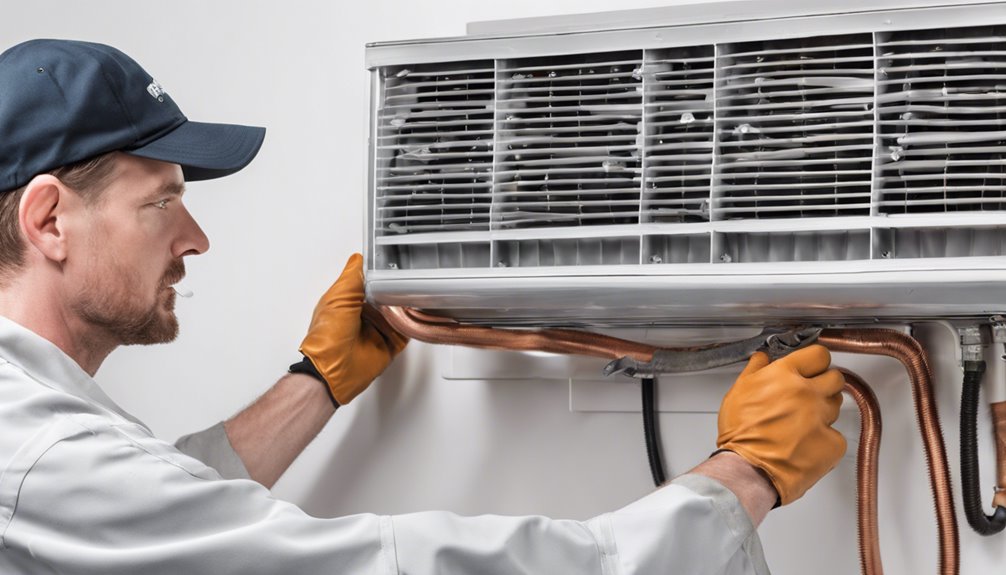
Inspect and Clean the Fan and Motor
While ensuring the window AC's exterior is spotless, don't overlook its internal components, particularly the fan and motor.
Proper fan maintenance is crucial for efficient airflow, so gently remove any dust or debris accumulated on the fan blades. Use a soft-bristled brush or a vacuum cleaner with a gentle suction setting to avoid damaging the fan.
Next, inspect the motor for signs of wear or corrosion. Apply a few drops of motor lubrication to the bearings to keep them running smoothly. Remember to refer to your window AC's user manual for specific guidance on motor lubrication, as the type and amount of lubricant may vary.
Balance the Thermostat for Efficient Cooling
You can optimize your window AC's performance by balancing the thermostat, and it starts with checking your temperature settings to ensure they're aligned with your comfort needs.
Next, you'll want to adjust the thermostat's sensitivity to prevent frequent on/off cycles that can increase energy bills. By calibrating the thermostat for optimal performance, you'll enjoy efficient cooling and significant cost savings.
Check Temperature Settings
The thermostat's temperature setting plays a crucial role in your window AC's overall performance.
During summer temperatures, it's essential to calibrate your thermostat correctly to ensure efficient cooling. If you set the temperature too low, your window AC will work harder, increasing your energy bills and reducing its lifespan.
On the other hand, setting it too high may not provide sufficient cooling. You should aim for a sweet spot between 68-72°F (20-22°C), which is considered the optimal range for most window ACs.
Adjust Thermostat Sensitivity
By fine-tuning the thermostat's sensitivity, you can strike the perfect balance between energy efficiency and cooling performance.
This adjustment is crucial to prevent temperature fluctuation, which can lead to increased energy bills and reduced cooling performance.
To adjust the thermostat sensitivity, follow these tips:
- Check your thermostat's calibration to ensure it's accurately reading the room temperature.
- Adjust the thermostat's sensitivity to respond to small temperature changes.
- Set the thermostat to a consistent temperature to maintain a stable cooling environment.
- Avoid extreme temperature settings, as they can cause the thermostat to malfunction.
Calibrate for Optimal Performance
As your window AC unit responds to the thermostat's settings, it's essential to calibrate the thermostat for optimal performance, ensuring efficient cooling while minimizing energy consumption.
You'll want to adjust the thermostat's sensitivity to balance the temperature and humidity levels in your room. This calibration process involves checking the thermostat's performance metrics, such as temperature accuracy and response time, to ensure it's operating within the desired range.
Remove Dust and Debris With a Deep Clean
Every few months, you should give your window AC a deep clean to remove the accumulated dust and debris that can hinder its performance.
Dust accumulation can block airflow, reducing ventilation importance and making your AC work harder. This leads to increased energy bills and a shorter lifespan.
To deep clean your window AC, follow these steps:
- Turn off and unplug the unit to avoid any electrical shocks.
- Remove the filter and wash it gently with soap and water.
- Use a soft brush or cloth to wipe away dust and debris from the exterior and interior vents.
- Use a vacuum cleaner to remove any remaining dust and debris from the unit's crevices and corners.
Perform Regular Maintenance for Long-Term Efficiency
Regular maintenance is crucial to ensure your window AC operates efficiently throughout its lifespan.
By performing scheduled checks, you'll catch potential issues before they become major problems. Set reminders to inspect and clean your AC's air filter, coils, and drainage system every few months.
These preventive measures will help reduce energy consumption, lower your bills, and extend your AC's lifespan. Additionally, check for any signs of wear and tear, such as loose screws or worn-out seals.
Addressing these issues early on will save you from costly repairs down the line. Stay on top of maintenance, and your window AC will continue to provide you with cool, comfortable air for years to come.
Frequently Asked Questions
Can I Repair a Window AC With a Refrigerant Leak Myself?
You can try to repair a window AC with a refrigerant leak yourself, but first, you'll need to detect the refrigerant leak and diagnose its source, which requires specialized equipment and expertise, making it a challenging DIY task.
How Often Should I Clean My Window Ac's Exterior Vents?
You should clean your window AC's exterior vents every 1-2 months to ensure airflow and prevent dust buildup. Regular vent cleaning, paired with filter maintenance, helps your unit run efficiently and prolongs its lifespan.
Are Window AC Units Compatible With All Window Types?
You're wondering if window AC units fit all windows. Truth is, they're designed to fit standard window frames, but compatibility depends on the window material – vinyl, aluminum, or wood – and its dimensions, so measure carefully before buying.
Can I Use a Window AC in a Room With No Windows?
You're wondering if you can use a window AC in a room with no windows. Unfortunately, it's not possible without compromising safety and efficiency. Consider room constraints and explore ventilation alternatives, like portable ACs or ductless systems, that don't require a window.
Do Window AC Units Come With a Built-In Dehumidifier Feature?
You're wondering if window AC units come with a built-in dehumidifier feature? Yes, many modern units do! They often have a dehumidifying mode that allows you to adjust humidity settings to remove excess moisture from the air.
Conclusion
You've made it to the end of our window AC repair and cleaning guide! By now, you've learned how to identify and fix common issues, from dirty filters to clogged drainage systems. Remember to perform regular maintenance to keep your unit running smoothly and efficiently. With these tips, you'll be able to enjoy cool, comfortable air all season long, without breaking the bank or calling a pro. Stay cool!